Menu


What to Do When Your AC Stops Cooling: Quick Fixes First
If you’re looking for ac troubleshooting tips before calling a professional, here’s the short answer — most cooling problems come down to a handful of simple, fixable issues you can check yourself in under 30 minutes:
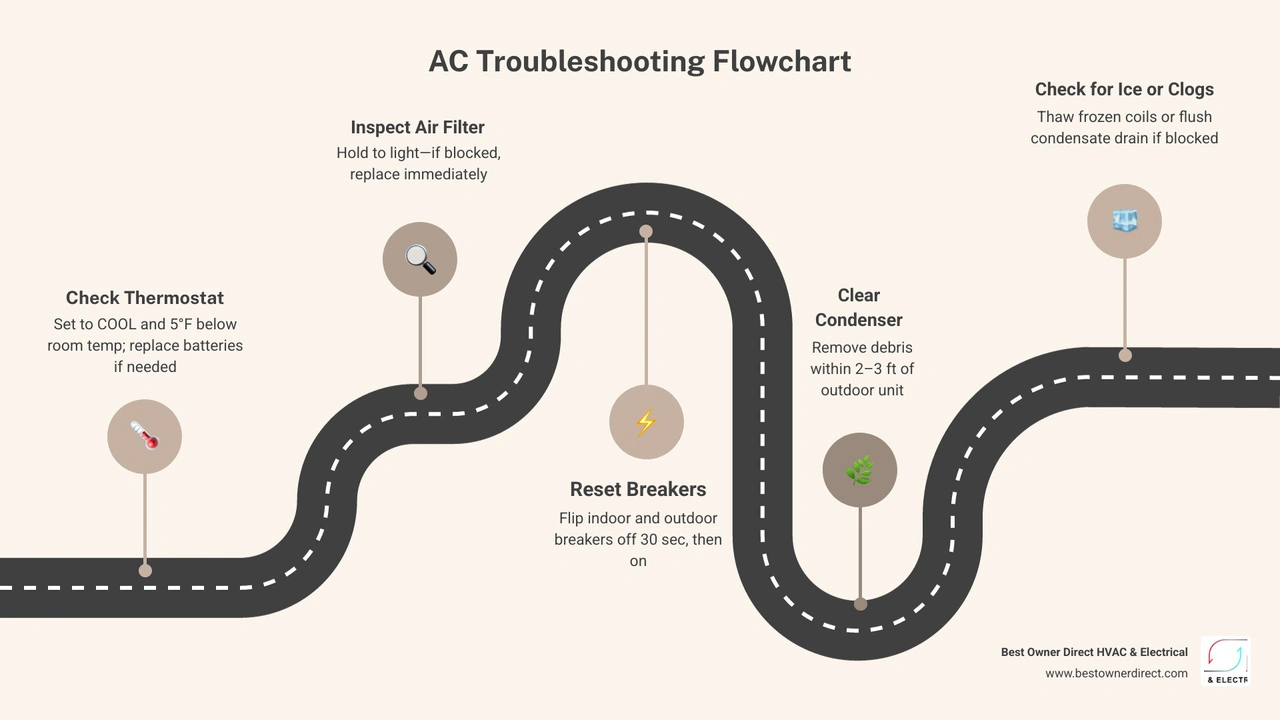
1. Check your thermostat — confirm it’s set to COOL mode and at least 5°F below room temperature
2. Replace the air filter — hold it up to light; if no light passes through, replace it immediately
3. Reset circuit breakers — check both the indoor and outdoor breaker, flip fully off for 30 seconds, then back on
4. Clear the outdoor condenser unit — remove any leaves, debris, or plant growth within 2-3 feet
5. Check for frozen coils — if you see ice on the indoor unit, switch to fan-only mode and let it thaw for 2-4 hours
6. Inspect vents and registers — make sure furniture or drapes aren’t blocking supply or return airflow
7. Clear the condensate drain line — look for standing water in the drain pan and flush with white vinegar if needed
If none of these steps restore cooling, it’s time to call a licensed HVAC technician.
It’s a scenario most homeowners know all too well: the hottest afternoon of the summer, and your air conditioner decides to stop working. Before you reach for the phone, it’s worth knowing that over 80% of AC breakdowns are caused by preventable issues — things like dirty filters, tripped breakers, and blocked vents — that you can often fix yourself in just a few minutes.
For homeowners in the Portland metro area and surrounding Oregon communities, summer cooling problems can hit hard. And while some AC failures genuinely need a licensed technician, many so-called emergencies turn out to be simple issues that don’t require a service call at all. Knowing which is which can save you time, frustration, and money.
This guide walks you through the most important checks to make before picking up the phone — and tells you clearly when it’s time to stop and call in a pro.
Why Try AC Troubleshooting Tips Before Calling a Professional?
When your home starts warming up, your first instinct might be to panic-search for emergency repairs. However, taking just 10 to 15 minutes to run through a basic diagnostic checklist is incredibly beneficial.
First, consider the numbers: over 80% of all AC breakdowns are caused by simple, preventable issues. Power supply problems account for roughly 30% of sudden AC failures, while clogged air filters cause about 25%. In fact, a dirty air filter is the number one cause of cooling system problems. Nine out of ten times when a central AC unit isn’t blowing cold air or refuses to turn on, the issue can be traced back to a simple airflow restriction or a tripped switch.
During peak Portland metro summers — whether you live in Hillsboro, Beaverton, Lake Oswego, or Oregon City — HVAC technicians are incredibly busy. Walking through basic troubleshooting steps first can save you the cost of a standard diagnostic visit for an issue as simple as a flipped switch.
Most importantly, basic troubleshooting is entirely safe for homeowners to perform. Our recommended steps do not require you to handle high-voltage wiring, open up complex electrical panels, or touch the refrigerant system. By acting as a detective first, you can either solve the problem immediately or gather valuable details to share with us, helping our technicians diagnose the issue much faster once they arrive.
Step-by-Step AC Troubleshooting Guide for Homeowners
When your air conditioner stops working, it is best to approach the problem systematically. Jumping randomly from checking the outdoor unit to looking at your vents will only lead to confusion.

By following a logical step-by-step path — starting with the power supply and thermostat, moving to airflow, and finishing with drainage — you can easily rule out the most common culprits. Let’s dive into the step-by-step checklist to get your cooling system back on track.
1. Verify Thermostat Settings and Power Supply
It might sound obvious, but you would be surprised how many service calls are resolved simply by adjusting the thermostat. Thermostats are easily bumped, reprogrammed by accident, or confused by sudden seasonal temperature shifts.
• Check the Mode: Ensure your thermostat is explicitly set to “Cool.” If it was accidentally switched to “Heat” or left on “Fan Only,” the system will run but won’t produce cold air.
• Lower the Temperature: Set the target temperature at least 5°F below the current room temperature. This forces the system to call for cooling.
• Replace the Batteries: Most programmable and smart thermostats require fresh batteries every 12 months. If the display is blank, dim, or acting erratically, replace the batteries immediately.
• Check the Location: Ensure there are no heat-generating appliances, lamps, or direct sunlight hitting your thermostat, which can trick it into thinking your home is much hotter than it actually is, causing the system to run constantly.
If your system won’t respond to any thermostat adjustments, read through our guide on AC Troubles: 10 Reasons Your AC Is Not Turning On & How to Fix It for deeper insight into power-related failures.
2. Check Circuit Breakers and Disconnect Switches
Central air conditioning systems are heavy power users, meaning they typically run on two separate electrical circuits: one for the indoor air handler or furnace blower, and one for the outdoor condenser unit. If a power surge occurs, one or both of these breakers can trip.
• Locate Your Electrical Panel: Look for circuit breakers labeled “AC,” “Air Conditioner,” “HVAC,” or “Furnace.”
• Identify a Tripped Breaker: A tripped breaker won’t always be completely in the “Off” position; it often hangs loosely in the middle.
• Reset the Breaker Safely: To reset it, flip the switch completely to the “Off” position first, wait 30 seconds, and then flip it firmly back to the “On” position.
• Check the Outdoor Disconnect: There is also a physical disconnect switch (often in a small metal box mounted on the exterior wall near your outdoor unit). Ensure the switch or pull-out fuse block inside this box is fully engaged and set to “On.”
Safety Warning: If you reset a breaker and it immediately trips again, do not attempt to reset it a second time. This is a clear sign of a severe electrical short, a failing compressor, or a bad capacitor. Repeatedly resetting a tripping breaker can cause electrical fires or permanently ruin your system. Learn more about this issue by reading Why Is My A/C Tripping the Breaker?.
3. Inspect and Replace Clogged Air Filters
If your AC turns on but blows weak, lukewarm air, your air filter is the prime suspect. A dirty air filter restricts the vital airflow your system needs to transfer heat out of your home. When airflow is choked off, your system works twice as hard, which can cause the evaporator coils to freeze solid or trigger a safety shutdown.
Replacing a clogged filter can lower your AC’s energy consumption by up to 15% and prevent major mechanical damage.
If you find that your system is running but failing to lower the indoor temperature, check out our helpful guide on AC Not Cooling Properly: What to Check First.
4. Clear Debris Around the Outdoor Condenser Unit
Your outdoor unit is responsible for releasing the heat collected from inside your home. If the metal fins on the condenser are covered in dirt, leaves, grass clippings, or Oregon’s notorious summer cottonwood fluff, the heat has nowhere to go.
• Maintain Clearance: Keep at least a 2-to-3-foot clear radius around all sides of your outdoor unit, and at least 5 feet of clear vertical space above it. Trim back any bushes, weeds, or overhanging branches.
• Clean the Coils: Turn off the power to your AC at the breaker or outdoor disconnect. Take a garden hose with a gentle spray nozzle and rinse the metal fins from the inside out to wash away built-up dust and cottonwood fluff.
• Never Use a Pressure Washer: The aluminum fins on your condenser are incredibly delicate. Using a pressure washer will instantly bend and ruin them, permanently blocking airflow and requiring professional repair.
5. Identify and Handle Frozen Evaporator Coils
When warm air cannot flow over your indoor evaporator coils, the refrigerant inside them drops below freezing. Moisture in the air will collect on the coils and turn to ice, creating a literal block of ice inside your air handler.
• Signs of Frozen Coils: You may notice weak or warm airflow, a visible layer of frost on the brass refrigerant lines near your indoor unit, or water pooling around the base of your furnace or air handler.
• How to Handle It: Immediately turn the thermostat to “Off” to stop the cooling cycle, but switch the “Fan” setting to “On.” This runs the indoor blower motor without running the compressor, blowing warm air over the coils to thaw them safely.
• Give It Time: The thawing process typically takes 2 to 4 hours. Do not restart the cooling system until the ice has completely melted. While waiting, inspect your air filter, as a dirty filter is almost always the root cause.
For a detailed breakdown of why this happens and how to prevent it, read Why Is My Air Conditioner Freezing Up?.
6. Check for Blocked Vents and Poor Airflow
Sometimes, the air conditioner is working perfectly, but the cool air simply cannot reach your living spaces.
• Check Supply Vents and Return Registers: Walk through every room in your home and make sure all supply vents and return grilles are completely open and unblocked.
• The Furniture Trap: It’s common to rearrange furniture for the summer, only to accidentally slide a couch, bed, or heavy rug directly over a vent. Ensure all furniture is kept at least two feet away from vents.
• Keep Interior Doors Open: Closing bedroom doors to “save energy” is actually a myth. It increases pressure inside your ductwork, starves the return system, and can lead to frozen coils. Keep interior doors slightly ajar to maintain balanced airflow.
• Ductwork Leaks: That roughly 30% of the energy in ducted HVAC systems is lost due to leaks, loose joints, or poor layout in attics and crawlspaces. If individual rooms are consistently warmer than others, it may point to a disconnected duct.
7. Inspect and Clear the Condensate Drain Line
As your air conditioner cools your home, it pulls gallons of moisture out of the air. This water drips into a drain pan and flows outside through a small PVC condensate line. Over time, algae, mold, and dust can build up inside this line, forming a thick clog.
Modern AC units are equipped with a safety float switch. When the drain line clogs, water backs up into the drain pan, lifting the float switch and instantly cutting power to your system to prevent water damage to your ceilings and floors.
• Look for Standing Water: Check the metal drain pan under your indoor unit. If it is filled with standing water, your drain line is clogged.
• Clear the Clog: You can use a wet/dry shop vacuum on the exterior end of the drain line (where it exits your home’s foundation) to pull the clog out. Hold the vacuum hose tightly against the PVC pipe for 30 seconds to clear the blockage.
• Preventative Maintenance: Once cleared, pour a cup of plain white vinegar down the indoor drain access port to kill any remaining algae. Doing this once a month during the summer keeps the line clear.
To learn more about keeping your system running smoothly and avoiding water damage, read our guide: Should You Clean Your AC Drain Line?.
When to Stop DIY and Call a Licensed HVAC Expert
While basic troubleshooting can resolve a surprising number of cooling issues, there is a clear line where DIY checks should stop. Working with high-voltage electrical components, handling chemical refrigerants, or attempting to repair complex mechanical parts without proper training is incredibly dangerous and can void your manufacturer’s warranty.
Knowing when to step back and call a professional protects your safety, your home, and your investment.
1. Recognizing Serious Mechanical Failures and Safety Hazards
If you encounter any of the following warning signs, immediately shut off your system at the thermostat and the breaker, and call us for professional service:
• Burning Smells or Sparks: A distinct odor of burning plastic, electrical fishy smells, or visible sparks indicate a severe wiring short or a motor burnout.
• Hissing Sounds: A persistent hissing sound from either the indoor or outdoor unit usually indicates a high-pressure refrigerant leak.
• Visible Oil Residue: Oily spots on the refrigerant lines or around the outdoor unit’s valves point to a refrigerant leak.
• Repeatedly Tripping Breakers: If your breaker trips more than once, there is a serious underlying electrical issue that must be diagnosed with professional meters.
To understand more about the warning signs that indicate your system is in trouble, read our guide on AC Repair Signs.
2. AC Troubleshooting Tips Before Calling a Professional for Strange Noises
Your air conditioner should operate with a gentle hum and the sound of rushing air. Loud, unusual noises are your system’s way of screaming for help.
• Squealing or Screeching: This typically points to a dry blower motor bearing or a slipping fan belt.
• Grinding or Metal-on-Metal: This is a major warning sign that the bearings in your compressor or condenser fan motor have failed. Turn the system off immediately to prevent the motor from seizing.
• Loud Clicking: Constant clicking when the system tries to start usually indicates a failing electrical contactor or a dying capacitor.
• Rattling or Banging: This can be caused by a loose fan blade hitting the housing, or loose panels vibrating against the frame.
If your system is making concerning sounds, refer to our articles on AC Making Strange Noises: What They Mean and How to Fix a Noisy AC for a deeper look at what these sounds signify.
Electrical components like capacitors and contactors are the unsung heroes of your AC system. The start capacitor acts like a heavy-duty battery, giving the compressor the massive jolt of energy it needs to start up.
During hot summer days, capacitors are subject to extreme heat and electrical strain, making them one of the most common parts to fail. Replacing a capacitor involves discharging high-voltage electricity, which can be fatal if handled incorrectly. If your outdoor fan is humming but not spinning, or if the unit is making a loud buzzing noise without starting, it is time to search for AC Repair Near Me and let a licensed professional handle the repair safely.
Routine Maintenance Schedule to Prevent Future Breakdowns
The easiest way to deal with an AC breakdown is to prevent it from happening in the first place. By staying on top of a few simple seasonal tasks, you can catch up to 90% of potential problems before they lead to a hot-weather emergency.
To keep your system running efficiently, review our guide on Signs Your AC Needs Repair Before Summer and follow this straightforward maintenance checklist:
• Inspect and replace standard 1-inch air filters — Frequency: Every 30 to 60 days — DIY or Professional?: DIY
• Inspect and replace thick 4-inch media filters — Frequency: Every 6 to 12 months — DIY or Professional?: DIY
• Clear leaves, weeds, and debris from outdoor unit — Frequency: Monthly during summer — DIY or Professional?: DIY
• Check and clear the condensate drain line — Frequency: Every 3 months in summer — DIY or Professional?: DIY
• Clean and straighten bent condenser fins — Frequency: Annually — DIY or Professional?: Professional
• Test electrical capacitors, contactors, and relays — Frequency: Annually (Spring) — DIY or Professional?: Professional
• Measure refrigerant levels and inspect for leaks — Frequency: Annually (Spring) — DIY or Professional?: Professional
• Deep-clean indoor evaporator coils — Frequency: Every 2 to 3 years — DIY or Professional?: Professional
Frequently Asked Questions about AC Troubleshooting
Why is my AC running but not blowing cold air?
This is usually caused by a lack of airflow or a heat transfer issue. Start by checking your thermostat settings to ensure it is set to “Cool” and the fan is on “Auto.” Next, inspect your air filter; a heavily clogged filter will starve the system of air. Finally, check your outdoor condenser unit. If the coils are covered in dirt, grass, or cottonwood fluff, the system cannot release heat, resulting in lukewarm air blowing from your vents.
How long should I wait to restart my AC after a power outage?
You should wait at least 30 minutes before turning your air conditioner back on after a sudden power outage. When power is abruptly cut, the refrigerant pressures inside the compressor are left highly unbalanced. Trying to restart the system immediately puts immense strain on the compressor motor and can cause electrical breakers to trip or damage the motor. Waiting 30 minutes allows the internal system pressures to equalize safely.
Can I recharge my AC refrigerant myself?
No. Under federal law (specifically EPA Section 608), it is illegal for anyone without proper certification to purchase, handle, or charge chemical refrigerants. Refrigerant systems are completely sealed; if your system is low, it means you have a physical leak that must be located, sealed, and pressure-tested. Attempting to add refrigerant yourself can easily ruin your compressor, void your warranty, and pose severe environmental and health hazards.
Conclusion
Taking the time to run through basic AC troubleshooting steps is a smart, safe, and effective way to manage your home’s comfort. Whether you live in Cornelius, Hillsboro, Beaverton, Forest Grove, or anywhere else in the greater Portland area, keeping these tips in mind can save you time and help you avoid unnecessary service calls.
However, when DIY troubleshooting isn’t enough, you don’t have to face the heat alone. At Best Owner Direct HVAC & Electrical, we are proud to be a family-owned business based in Cornelius, OR, delivering reliable, honest, and high-quality cooling services to our neighbors. Our licensed technicians are always ready to help you restore your home’s comfort safely and efficiently.
If you have completed your checklist and your home is still too warm, don’t wait — visit our AC Service Portland OR page today to schedule a professional, worry-free system tune-up or repair!


Reading Between the Lines of HVAC Reviews in the Portland MetroEvaluating contractors ahead of the fall heating season requires more than glancing at a star average. See which review details prove genuine community accountability over slick automated marketing.
Read more
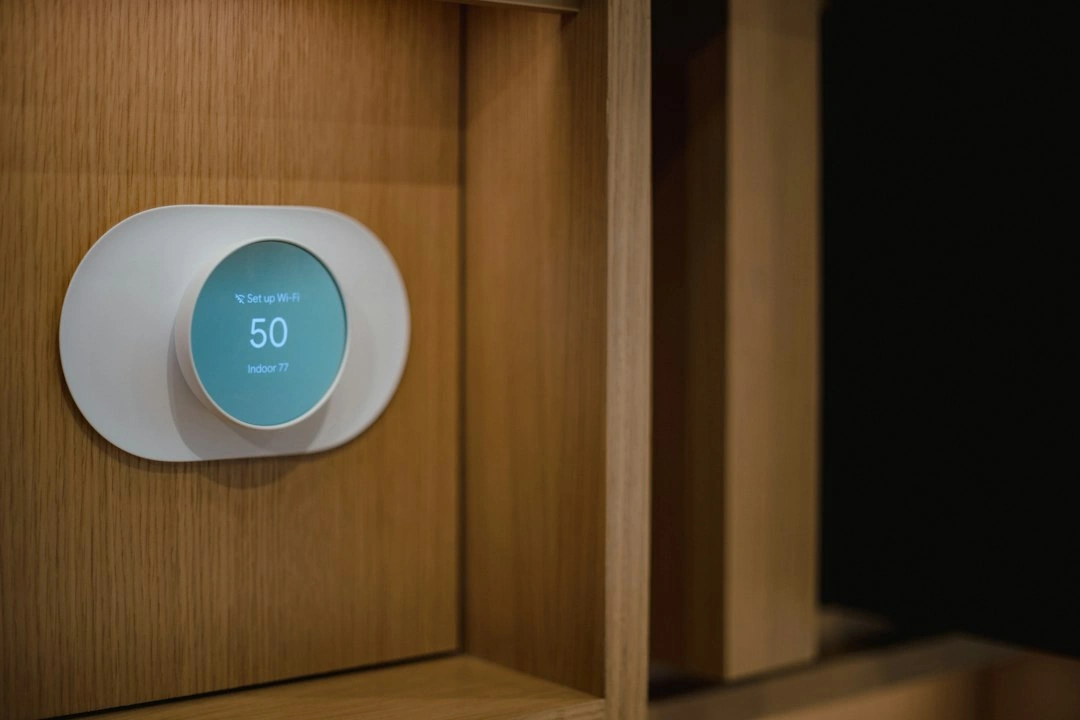
How Oregon Homeowners Can Test Thermostats Before Calling for Local Heat Pump RepairLearn how to check your thermostat before calling for heat pump repair with this step-by-step guide for Oregon homeowners.
Read more
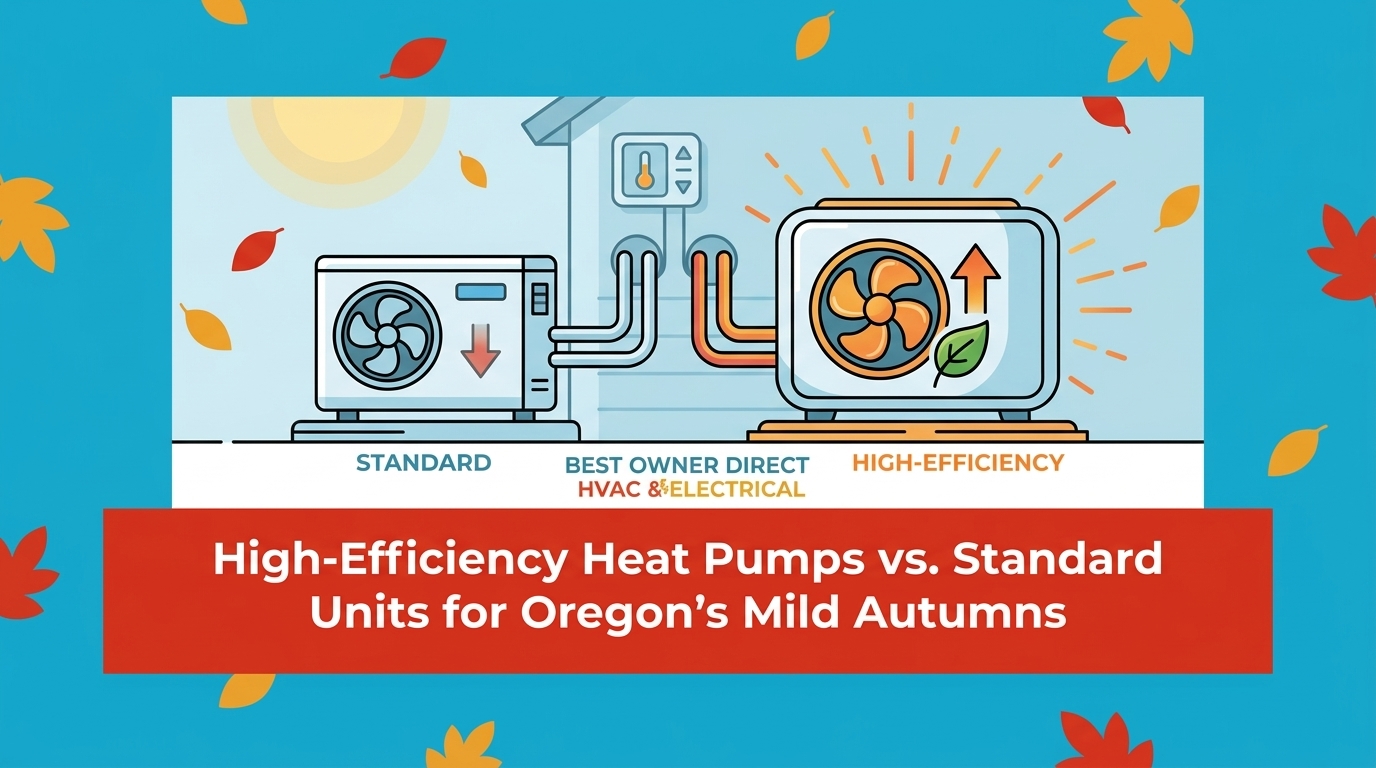
High-Efficiency Heat Pumps vs. Standard Units for Oregon's Mild AutumnsStandard heat pumps often blast too much heat on chilly fall mornings, causing uncomfortable temperature swings. Inverter-driven systems solve this by providing gentle, constant warmth.
Read more